

Sin categorizar
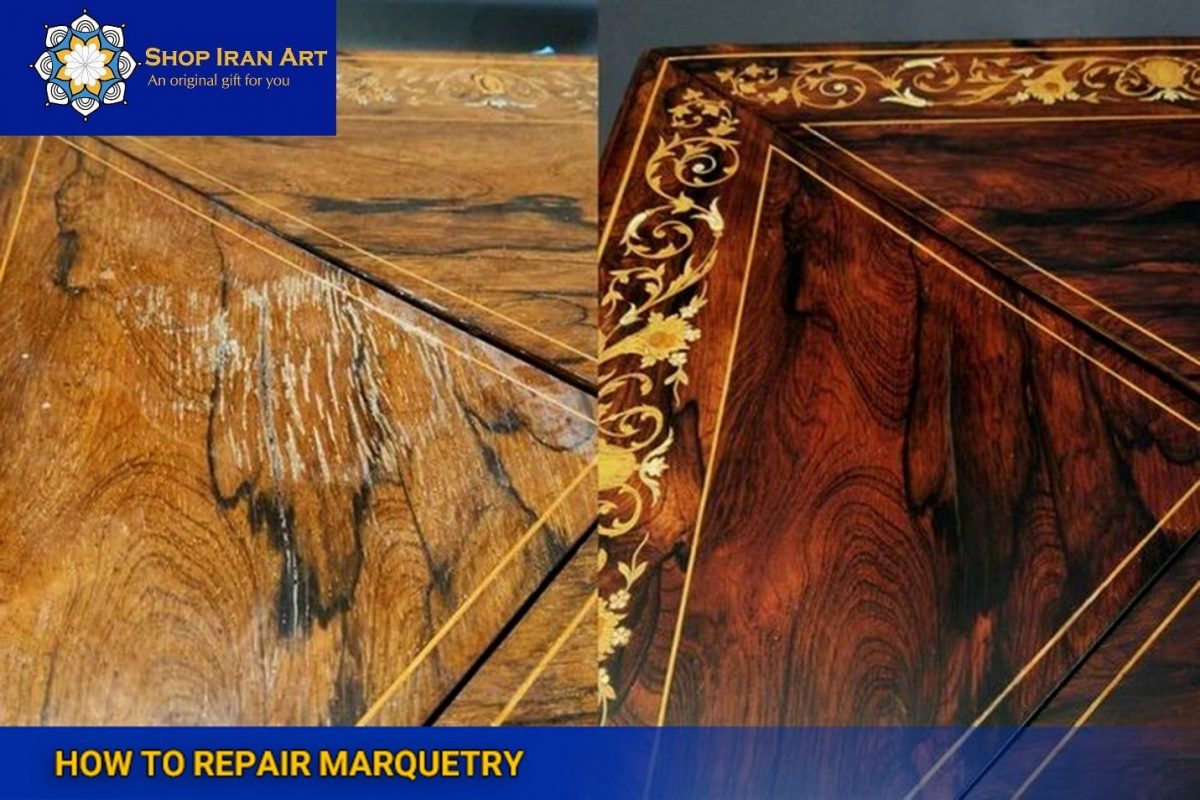
How To Repair Marquetry
Jul
how to repair marquetry
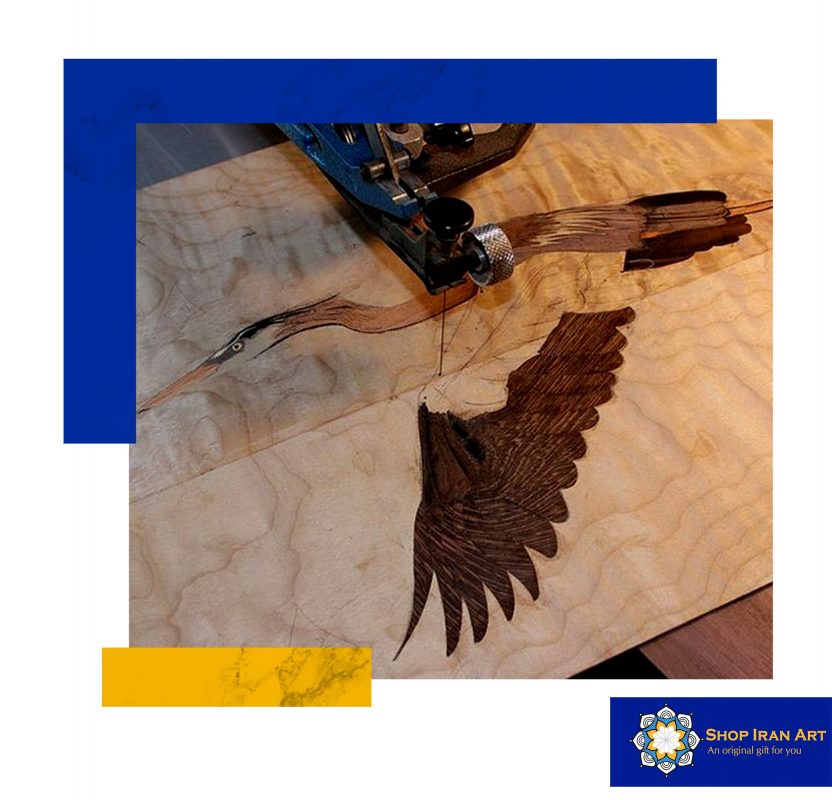
Furniture and decorative items can be transformed into works of art using the exquisite woodworking technique known as marquetry. Marquetry brings a touch of elegance and sophistication to any room with its intricate patterns and delicate veneers. Marquetry can, however, succumb to the ravages of time, just like any beloved craftsmanship, leading to broken or deteriorated pieces.
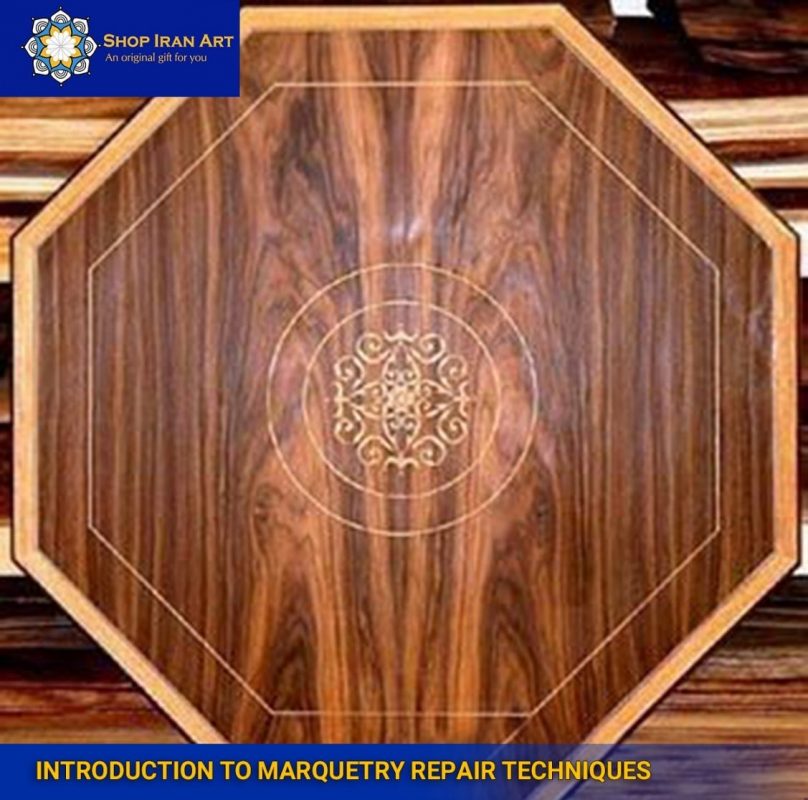
Introduction to Marquetry Repair Techniques
The art of restoration became an essential skill to preserve the elegance and craftsmanship of marquetry. With its intricate designs and delicate finishes, marquetry creates fascinating works of art. However, these works of art can get damaged over time and require the hands and expertise of professionals to restore them to their former glory.
Understanding the fundamentals of marquetry repair begins with recognizing the various types of damage that can afflict these intricate creations. Each issue presents unique challenges and demands specific approaches, from missing veneer to lifting or cracked pieces. Learning to assess the damage and identify its underlying causes, you will be better equipped to plan and execute the necessary repairs.
With this knowledge, we will explore the tools and materials required for marquetry repair. Each device has its role in restoration, from specialized chisels and veneer glue to sandpaper and clamps. We will explore their functions, discuss the qualities to look for in quality materials and provide guidance on sourcing them.
Assessing the Damage
Before embarking on an intarsia restoration journey, it is critical to assess the extent of the damage and understand the unique challenges each situation presents. This step is the basis for effective planning and execution of necessary repairs. This section dives into the mosaic damage assessment process, giving you the knowledge to recognize and understand the problem.
When inspecting the marquetry, your keen attention to detail will help you identify signs of damage. Common types of marquetry damage include missing veneer, raised or cracked pieces, and discolouration. Scrutinize the surface, particularly areas with open front or fallen debris. Look for holes or bumps that indicate possible damage or degradation. Beware of discolouration or fading that could affect the overall aesthetic. Understanding the cause of the damage is essential to develop an appropriate repair strategy.
For example, missing veneers can result from natural ageing, previous repairs, or improper processing. Lifting or cracking of parts can be due to fluctuations in temperature and humidity, incorrect application of adhesives or structural weakness. Fading can be caused by exposure to sunlight or improper cleaning methods. By identifying the root causes, you can effectively eliminate them during the repair process, ensuring a more durable and long-lasting repair.
Tools and Materials
When performing an inlay restoration, you must have the right tools and materials to achieve satisfactory results. This section will explore the various devices and materials that allow safe and accurate inlay repairs.
Chisels
quality chisels are indispensable for mosaic restoration. Chisels of different sizes and shapes are used for multiple jobs, such as removing damaged veneer, cutting precise grooves, or creating clean edges. Look for chisels with sharp, durable blades for precise control and smooth cuts.
Veneer adhesive
The vital cement for inlays is essential for a solid and long-lasting bond. The veneer adhesive is specially formulated for wood veneers to provide excellent adhesion while maintaining flexibility. Look for a high-quality adhesive that dries clear, has a long working life and has good sealing properties.
Sandpaper
A variety of sandpaper grits, from coarse to fine, are essential for surface preparation, smoothing of edges, and a seamless finish. Sandpaper with a tear and clog-resistant backing provides efficient and effective sanding. Consider using a sanding block or stand to maintain even pressure and prevent accidental damage.
Clamps
Clamps are essential for securing parts during restoration to ensure proper joining and alignment. Depending on the specific requirements of the repair, different types of clamps can be used, such as rod clamps, spring clamps or strap clamps. Choose clamps that provide enough pressure without damaging the delicate surface of the veneer.
Putty
Wood putty helps repair marquetry holes, cracks or minor imperfections. Choose a putty that matches the colour and grain pattern of the surrounding veneer. Ensure the filler is compatible with the adhesive and finish you plan to use.
Brushes
A high-quality meeting is essential for applying adhesives, finishes or stains. Look for a meeting with fine bristles for precise and controlled application. Consider using different-sized brushes to adjust different areas and details of the mosaic.
Pigments
Pigments or dyes can be used to match and enhance the colour of the restored marquetry. They can be mixed with adhesives or finishes to achieve desired tones and blend seamlessly with existing veneers. Choose pigments that are fade resistant and compatible with your chosen finish.
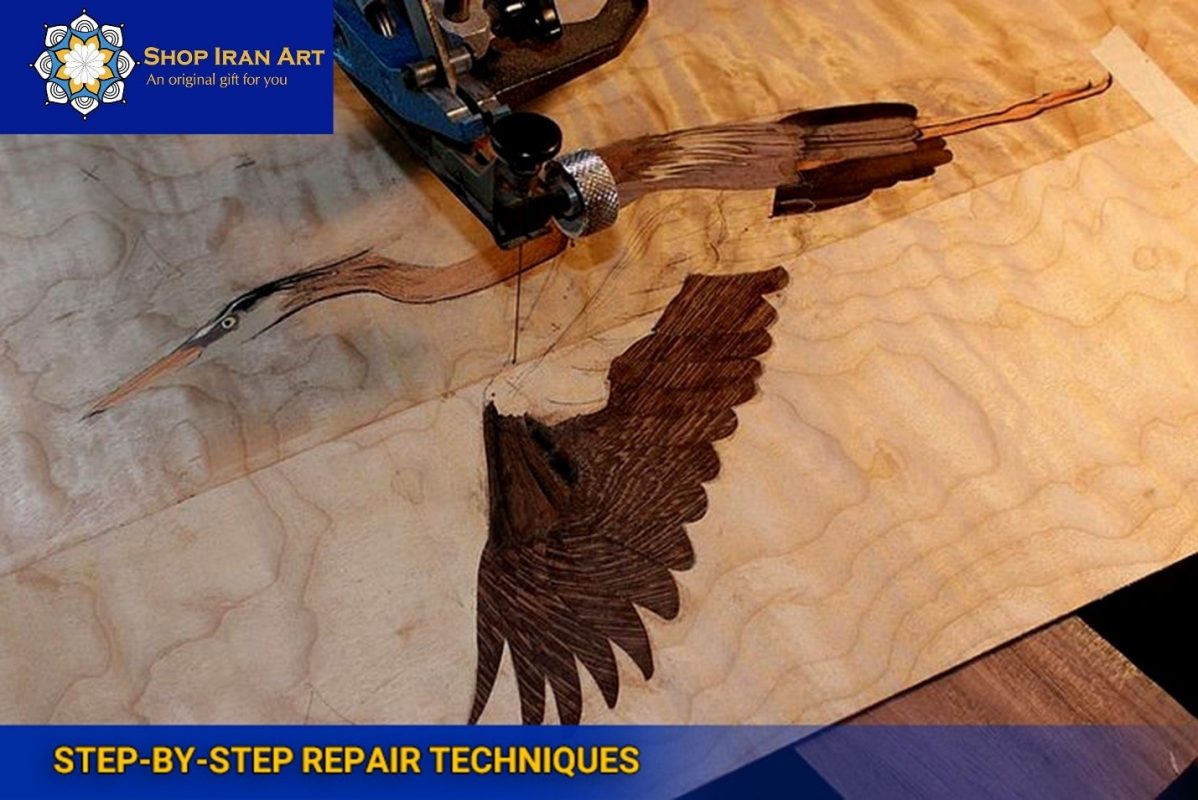
Step-by-Step Repair Techniques
Embarking on the journey of marquetry restoration requires a systematic approach and keen attention to detail.
To prepare, first, create a clean and well-lit workspace. Remove any loose or damaged veneer pieces and carefully set them aside for later repair. Thoroughly clean the surface of the insert to remove dirt, grime and any remnants of old adhesive. Board replacement; if you have a lost or damaged board, you must select an appropriate one.
Use a sharp pencil to carefully trace the shape of the missing piece on the new front. Applying glue; apply a thin layer of veneer adhesive to the replacement area and the area it will be placed on. Use a small brush or toothpick to spread the glue evenly, ensuring complete coverage. Place and press; carefully place the replacement veneer, aligning the grain and pattern with the surrounding inlay. Use light pressure with your fingers or clips to hold the mask in place.
Patching and stuffing; if there are small holes or cracks in the marquetry, patch them with a suitable putty. Apply the filler with a small spatula or trowel and press firmly into the holes. Regulate and stabilize; for raised or cracked veneers, apply a small adhesive to the affected area. Use a fine brush or sprayer to spray the adhesive into crevices or under raised lightfronts. Chop and mix; sand the repaired areas when all repairs are complete and the glue is dry.
Use progressively finer sandpaper to achieve a smooth, flawless finish. Final thesis; apply a suitable finish to restore the original lustre and protect the restored inlay. Choose a finish that highlights the natural beauty of the wood and ensures durability. Apply the topcoat with a brush or cloth according to the manufacturer’s instructions.
Explore marquetry repair techniques and find the necessary tools and materials at Shop Iran Art, your trusted online destination for woodworking supplies and resources.
Conclusion
Marquetry repair is a labour of love, requiring patience, skill, and a deep appreciation for the artistry of the past. Throughout the repair process, you have explored topics ranging from assessing the damage to selecting the right tools, executing step-by-step techniques, and ensuring proper finishing and preservation. By passing on your skills and insights, you contribute to preserving and celebrating this unique art form.
Is marquetry repair suitable for beginners?
Marquetry repair can be challenging and requires a certain level of skill and precision.
What are some standard tools needed for marquetry repair?
Standard tools for marquetry repair include chisels, sandpaper, clamps, veneer glue, brushes, and pigments.
Can damaged marquetry be repaired without removing the entire veneer?
Yes, damaged marquetry can often be repaired without removing the veneer as a whole.
